
It seems like a lot of people have been seeing my Flickr photostream and wondering what I must be up to- especially after my photos got linked on hackaday and reddit. Well, I’ve been meaning to write a detailed blog post explaining it all- but I keep running out of time. So I guess a “short” blog post is better than nothing.
The executive summary is that I’ve been working on making it possible to run homebrew games on the DSi. If you’ve used The Homebrew Channel on the Wii, you know what I’m talking about- we’d basically like to have the same thing for the DSi. And as it turns out, the DSi has a lot in common with the Wii.
I haven’t been working on this project alone. I’ve been collaborating with the excellent software and hardware engineers in Team Twiizers, the group responsible for The Homebrew Channel. Bushing has written a couple blog posts about our DSi efforts so far: one on the RAM tracing effort in general, and one with a sample trace.
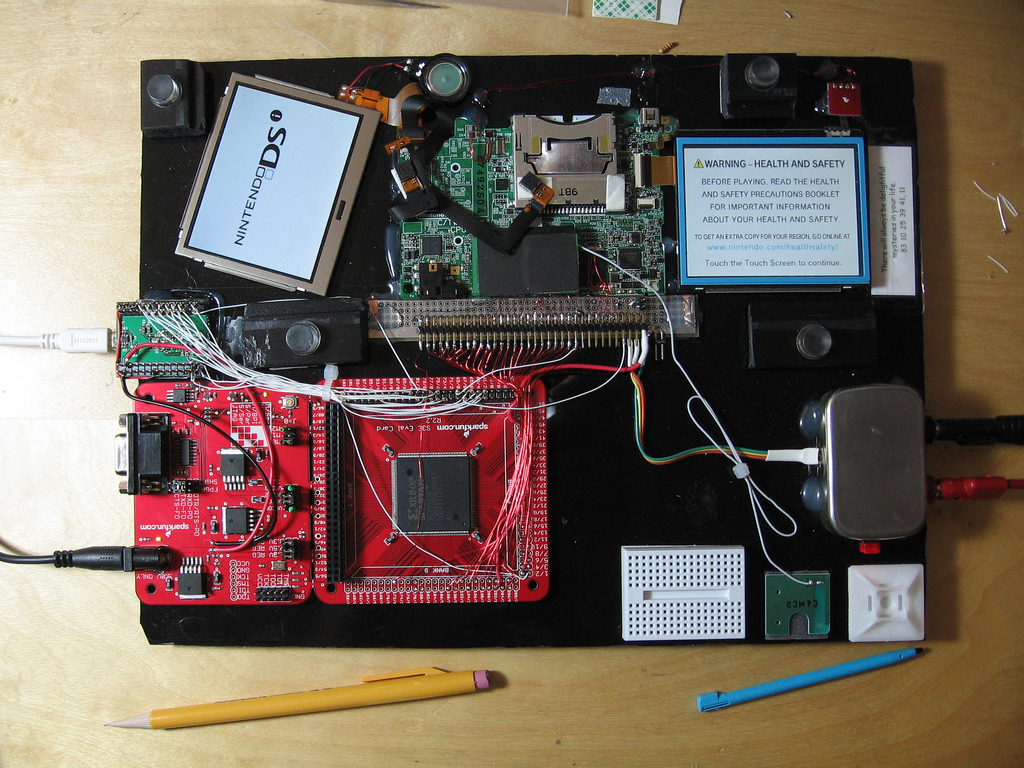
My role in this project lately has been building hardware and software for a tool which is effectively a low-level CPU debugger for the DSi. It attaches to the RAM bus between the RAM and CPU, it’s capable of tracing all traffic in ‘real-time’ (after slowing down the system clock so the required bandwidth fits in USB 2.0), and just this week I got RAM injection working. The hardware interposes on one of the chip select signals between the CPU and RAM. If an address floats by that we want to patch, the hardware can quickly disable the real RAM chip and drive new data onto the bus as the CPU continues to read. It’s a very effective technique, and my hardware has a pretty capable system for storing and retrieving up to 16 kB of patch data now.
So why is all the complex hardware needed? Well, we hit two big dead-ends:
- Several of us managed to run code from within a DSi-enhanced game using modified save files, but most of the interesting hardware on the DSi (like the SD card slot, and the internal flash memory) is disabled when these games are running. The earlier Team Twiizers Classic Word Games hack, WinterMute’s cookhack, and my own cookinject (navi-misc/nds/dsi/cookinject) all suffer from this problem.
- I’ve been able to read and write flash memory for a while. This isn’t as interesting as it may sound, since nearly all of the flash is encrypted. However, by running a lot of tests where we modified or compared the encrypted data, we were still able to gain a lot of knowledge about the layout of the flash memory, and some information about how the system boots.
What we’d really like to do is understand more about how the console’s main menu works, and how software is installed and loaded on the DSi. The best way to do this seemed to be RAM tracing. It required an FPGA and a lot of crazy soldering under a microscope, but now it’s working and we’re well on our way to unlocking the secrets of DSi homebrew.
If you’re interested in following our efforts to make homebrew possible on the DSi, definitely subscribe to Bushing’s blog at hackmii.com. He understands the Wii (and by extension, the DSi) better than I ever will, and he’s great at writing about it.
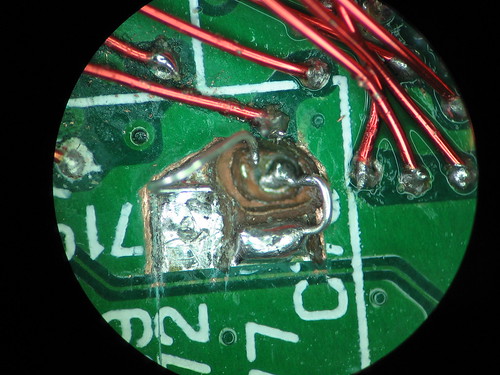
I have a Flickr set with lots more photos, but these are two of my favorite. The first is a photo of the entire setup as it’s currently configured. The second is a picture of the craziest of the microscopic solder joints in this project. This is where I separated the chip-select signal I mentioned above, giving the FPGA the ability to sit between the CPU and RAM. The trace I’m tapping into is buried under four other PCB layers. For a sense of scale, the orange enameled wire is 32 AWG, or about 0.2mm in diameter. Normal 30 AWG wire-wrapping wire is actually only the third smallest size of wire I’ve been using in this project 🙂

If you’re interested in the C and Verilog source code, it’s in Subversion as usual.